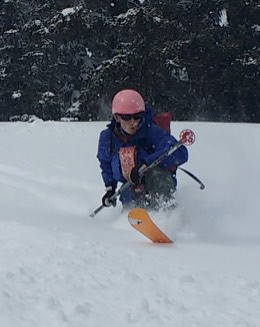
 Lurking around Lurking around by Christian I've been getting more and more comments on my lurk - that is, my single long pole used for telemark skiing. When skiing with one you pole-plant on the same side you normally would (downhill), turn around it, and then (optionally) drag the pole behind you in a low-brace position as you pass by it; it looks almost like paddling a kayak. I won't say it's easier or better than two poles - it's more of a solution looking for a problem - but it is a lot of fun and has some advantages in a very limited set of situations. It does look good, though, or at least it looks different. Kind of like telemark skiing, in general. While one long pole is fun on the downhill on the uphill you really want two poles, whether skinning up yourself or waiting in lift lines. So I made my own take-apart lurk good for the up and the down. After a few iterations I came up with a design that's been pretty robust for 2 seasons and is actually pretty easy to put together. Here's a short description of how to make one. You'll need:
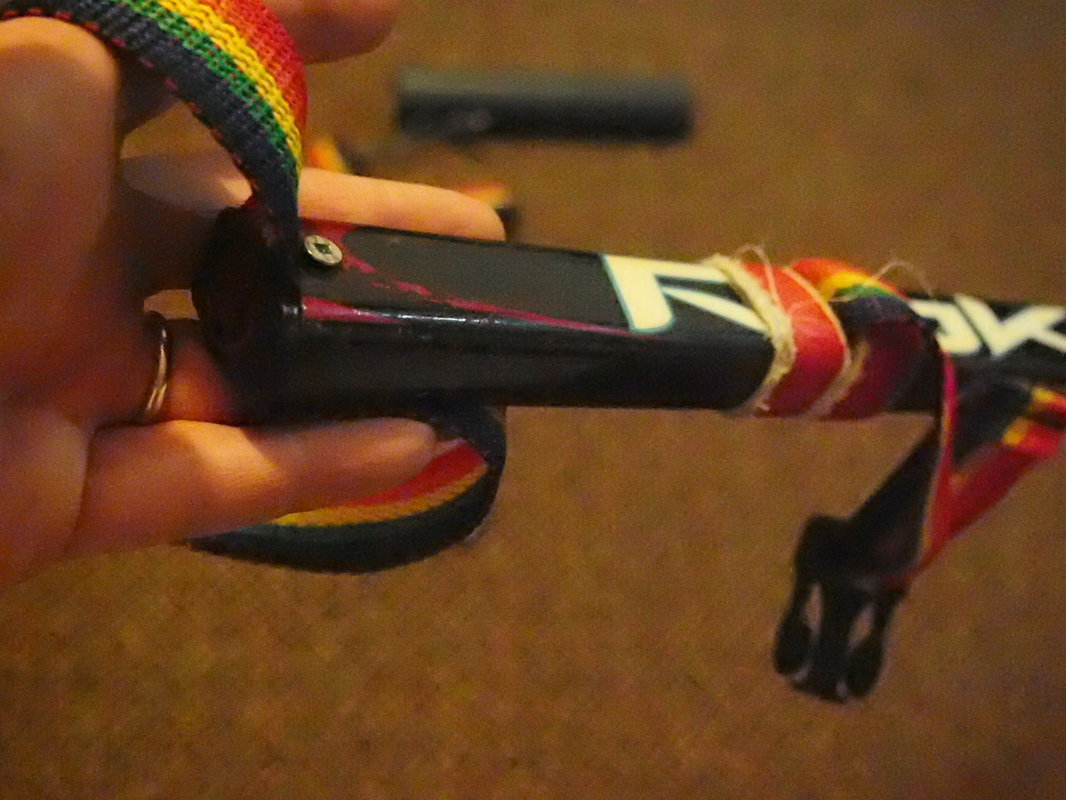
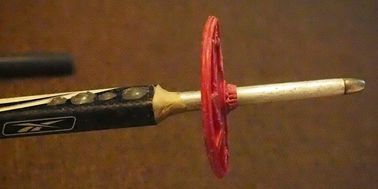 Bonus points if your tips have maple leaf baskets. Bonus points if your tips have maple leaf baskets. The tips: For the tips I basically just cut the bottom 8 inches off of some old ski poles, and stuck them on the end of the hockey sticks. I cut the blade-end off the hockey stick so I was left with a hollow cross section, put the tips in, drilled 4 holes through everything, and fastened it with rivets. I had originally hoped to use 8 rivets (one from each side for all holes) but the rivets I had left a little too much material inside the ski pole. So I just alternated sides (really this also means I didn't need to drill clean through everything). So it doesn't fill with water/snow I covered the holes/rivets with regular epoxy, and moulded some epoxy putty in-place with my hands to seal the hollow cross section around the pole. Overall length: Once you've made your tips you want to ski around a bit to decide on how long to make it. You can make it shorter pretty easily, but it's difficult to make it longer. I'm 180 cm tall and made mine 122 cm from the end to the basket, 130 cm to the tip (per side - 260 cm total). You can temporarily "join" the lurk to be shorter to see how it feels by just overlapping the two sections and using some ski-straps. The grips/joint: You don't really need "grips" since the whole thing is a hockey stick, which is already a good shape to grab anywhere you like (and warm to the touch because it doesn't conduct heat well). I made the joint by cutting a piece of 1.25" sched 80 PVC pipe just a little longer than both "grips" (22 cm for me) and trapping some webbing under multiple wraps of tape at the bottom of the grips. I found the sched 80 pipe to be the correct diameter for a satisfying fit. To join it you just slide the tube over the end, it bottoms out against the tape, you stick in the other side, and buckle the webbing across it. Hopefully it's clear from the photos... I later added some wrist straps using matching webbing. I just tucked them under the hockey stick end-cap, and added a small screw (remember to pre-drill!) to keep the cap from popping off. I also drilled some holes in the PVC pipe and tied a little piece of string through it so I can clip the tube to my water bottle carabiner when skiing uphill (and with the buckle between poles for storage). Probably I should drill some more holes in it, just to save weight, but haven't bothered yet. It's not like I bring my lurk with me on fast-and-light trips. Overall weight for everything is just over a kilo. Some average ski poles from our pile of gear weigh just under 500 g for the pair... so these are certainly heavier, but are not obscenely heavy by any stretch. Don't forget the camera mount!
1 Comment
 All babies/toddlers are different and I am definitely no expert in baby sleep, but we have done a fair amount of experimentation with sleeping the backcountry. In this blog post I will share the phases and solutions we have gone through. Our very first backcountry trip with F was to Brew Hut in May at 7 month old. At home we co-slept and night nursed, so I expected to do the same on the trip. The hut is pretty warm, but gets colder throughout the night, which is kind of tricky for little once as they can not add extra layers themselves. We ended up dressing her in her normal clothes and sleep sack, and then covered her with my sleeping bag as it got colder. The night was generally pretty rough, there were many wakings and I think F ended up sleeping mostly attached to my breast, which meant basically no sleep for me.
The whole summer we basically followed the same strategy of F just sleeping in her clothes, a sleep sack and then covering her with my sleeping bag if needed. However, during our trip to the Sierras, where temperatures dropped to close to 0 °C we did experiment a bit. I found that zipping a down jacket around F's waist for extra warmth worked pretty well. I liked this solution because it doesn't require any extra gear. The down side is that the feet and arms and hands still gets cold. The feet are easy to fix with a pair of booties. The hands and arms are trickier as a lot of babies prefer to sleep in the star fish position. A pair of long mittens work well if they are tolerated. Luckily F just seems to have way better circulation that I do. F never really wanted a blanket on, and before she turned one I was still a little bit worried about putting her in a sleeping bag. I don't know if I am crazy, but mostly I worried that putting her in a sleeping bag would increase the risk of SIDS. I did not want anything that could potentially cover her face or restrict her movement to much. However, during her second spring of camping I started to fell better about sleeping bags, so we tried out a stroller bag. There was no way she was getting into it - I think it was to constricting to her movements. We quickly discovered that leaving her in her merino wool, fleece and snowsuit was the way to go, and if it was extra cold we would cover her with one of our sleeping bags. This method has worked great. The only downside with this solution is when F decides that she wants to sleep on top of me. She will now be too warm to wear a sleeping bag and I am therefor forced out of my sleeping bag. Good thing I have a warm down jacket. 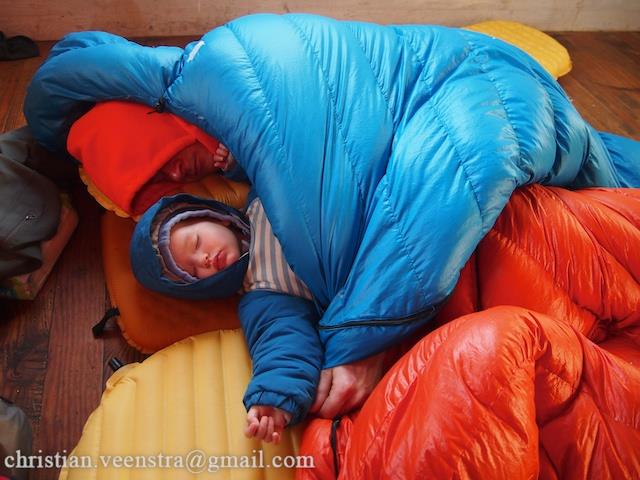 Last spring we started experimenting a bit again. F is slowing becoming more tolerant of blankets, so we have acquired a down quilt - just a cheap adult size from Costco. F sleps very warm and often insist on going to bed wearing little clothes and on top of the sleeping bags. The quilt makes it easy to wrap her up little by little as it gets colder. In preparation for our trip to Alaska this past summer we also bought a new sleeping pad, the Exped Synmat Hyperlite Duo. It is a double sleeping pad with synthetic insulation, and it only weighs 800g (~100g more than two Neo Air). It is the best thing that ever happened to family camping! It is warm, comfortable, and I no longer end up half way in between sleeping mats. It has two different valves, so I can turn without worrying about waking up F. I just love it! I am sure that the sleeping arrangement will continue to evolve throughout the seasons and the years, but I think the Exped and the down quilt get to stay for a little while. What does your sleeping arrangement look like? 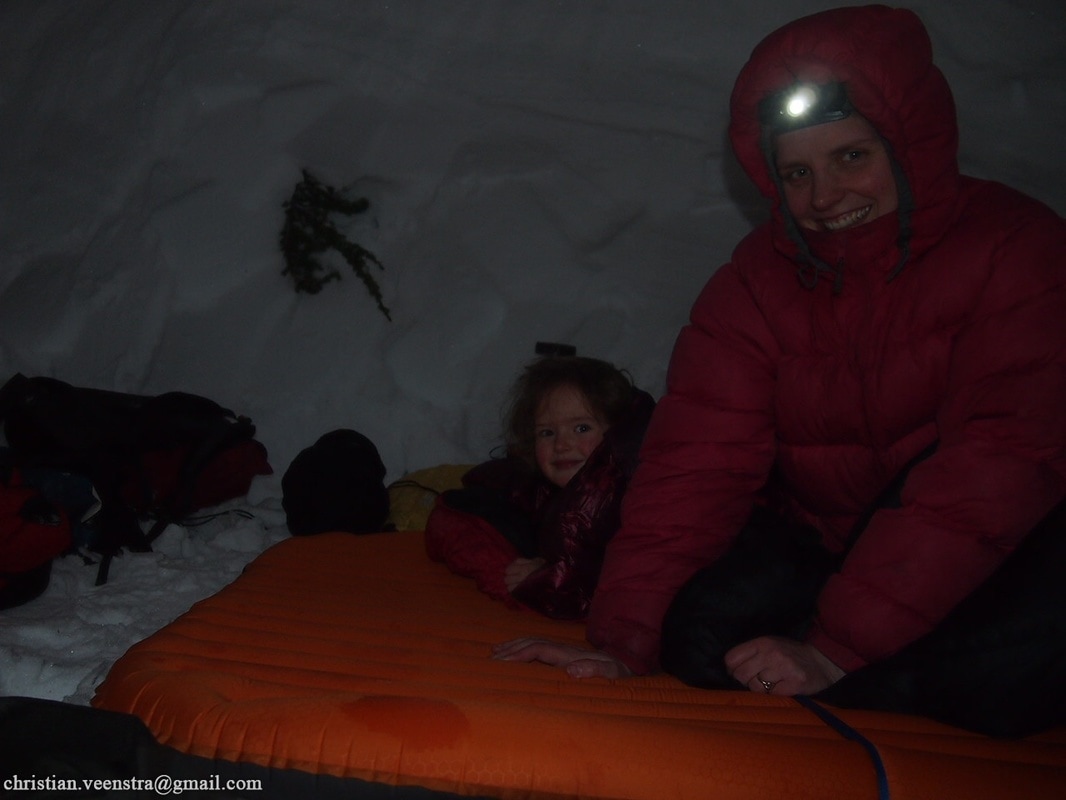 Enjoying the Exped and the down quilt in our Red Heather snow cave In preparation for the ski season Christian has been fixing our gear. Here is his account of the reason projects: 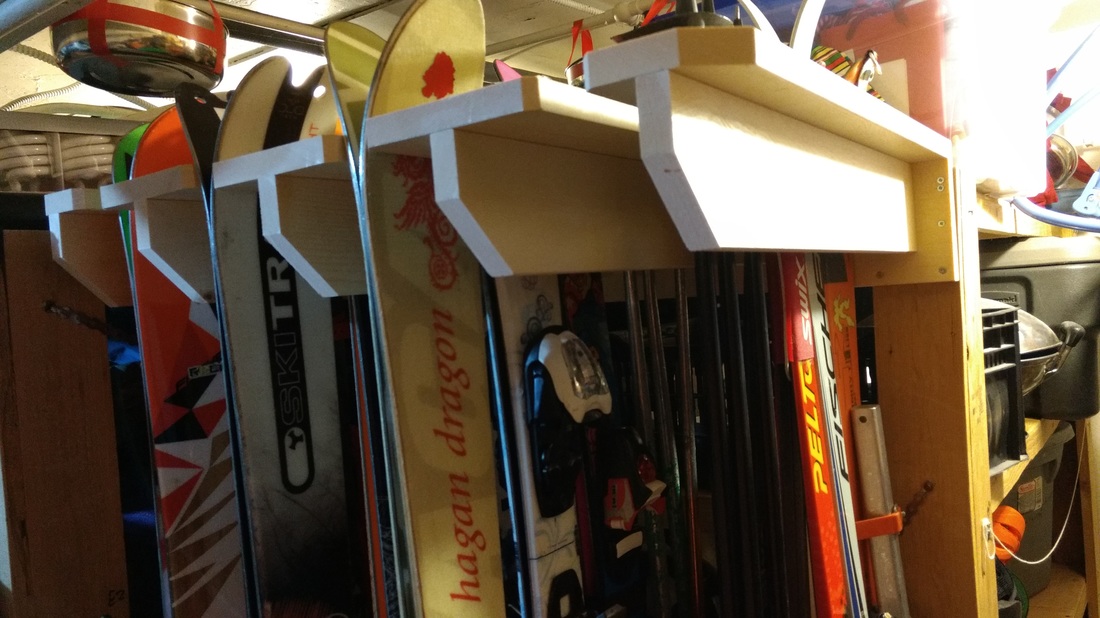 Made a new ski-rack for the gear room. It can hold 16 pairs of skis (4 across by 4 deep; or double that for XC skis). We actually only have 12 pairs of skis in the house right now, including 2 that don't belong to us, but it holds all the poles too. It's way better than the old plastic garbage bin we used to just throw them all in. 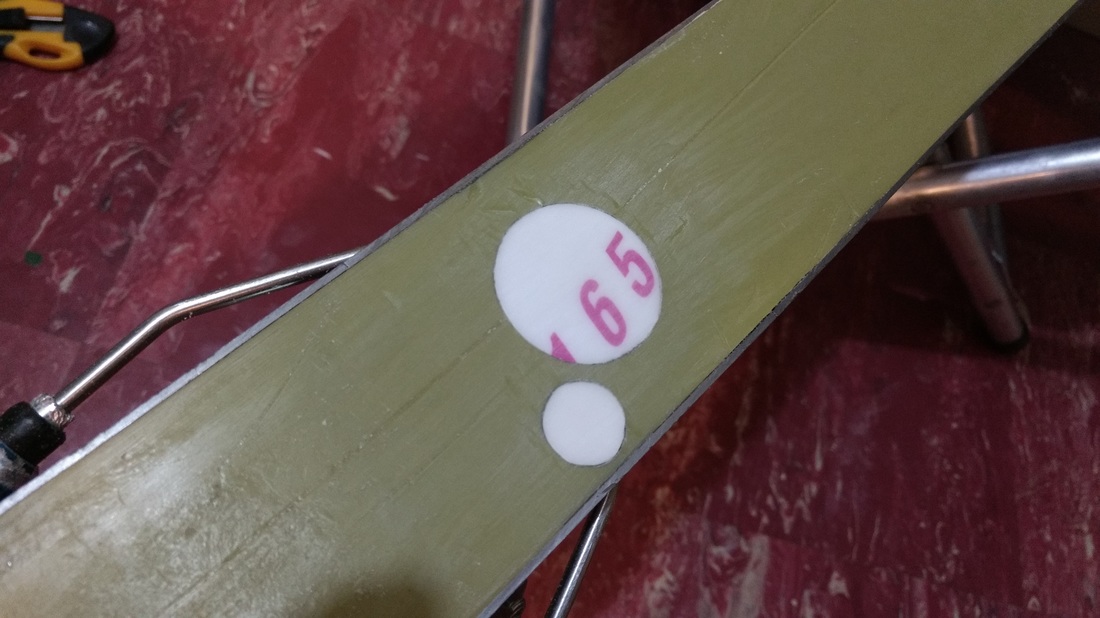 Fixed two core shots in Line's ski, by cutting pieces of base material out of a "donor ski", epoxying them in place, and smoothing everything out flat. It was good to have the donor ski to practice on. 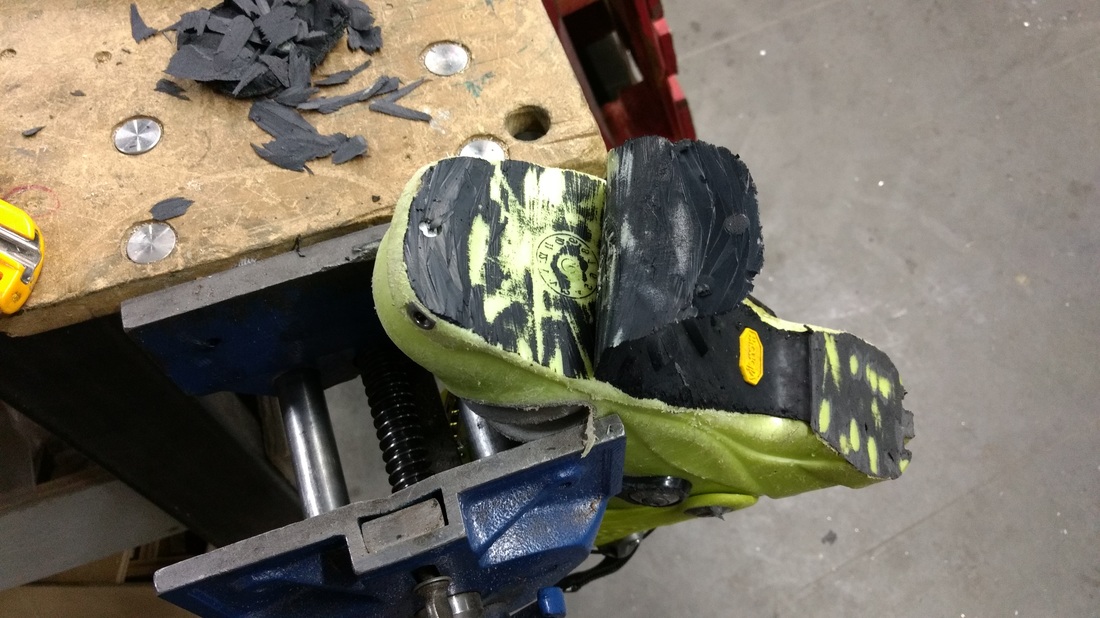 Resoling Line's Boots. I cut off the old sole and epoxied on the fore-foot section last week. This weekend I trimmed the edges, sculpted the toe area a bit so that the boot interfaced properly with the tech-toe, and set up the heel block. The the heel block is currently clamped and curing... should be ready to trim this week. Pleased with the results so far - the sole showed no signs of separating during trimming/sanding, and I fully flexed the bellows without any scary cracking sounds.
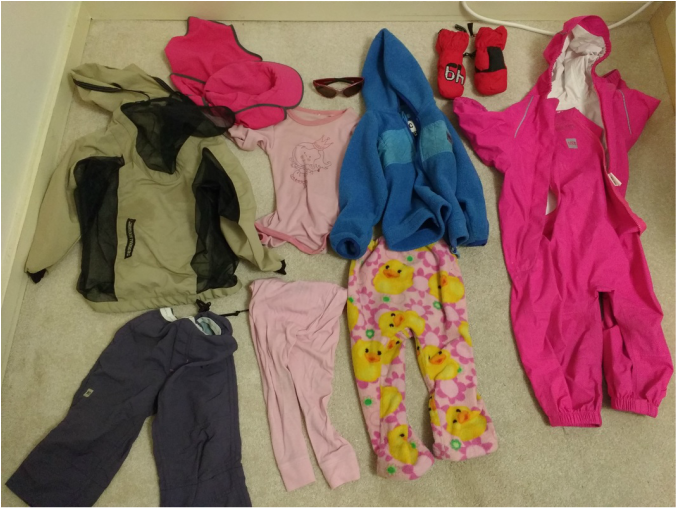
 On a colder day or on any overnight trip we also bring a snow suit. We still can't get F to sleep in a sleeping bag, so we just dress her in her snowsuit for sleeping.  We always bring two sets of footwear. In colder(snow) weather we would bring winter boots and booties. In wetter weather we would bring winter boots and rain boots. In warmer weather we would bring shoes and winter/rain boots. What does your baby/toddler wear in the backcountry?
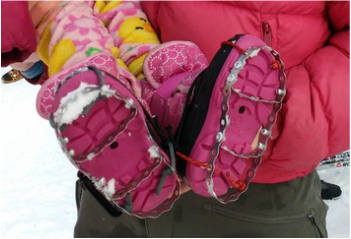
Taking a baby into the backcountry, also means taking diapers into the backcountry, but how? When F was 9 month old we went on a 8 day hiking trip in the High Sierra, CA. While planning the trip I spend a long time searching the internet for diapering ideas. I found little info. We already used cloth diapers at home, so that seemed like the natural choice. Already before F was born I knew that we wanted to go on multiday backcountry trips, so I primarily invested in pre-folds. Pre-folds are ideal because they can be unfolded and therefor dry fast. I found that pre-folds didn't really work well at night, so for night time we settle for a fitted diaper with an extra insert. This was our final selection (I don't remember the exact number): 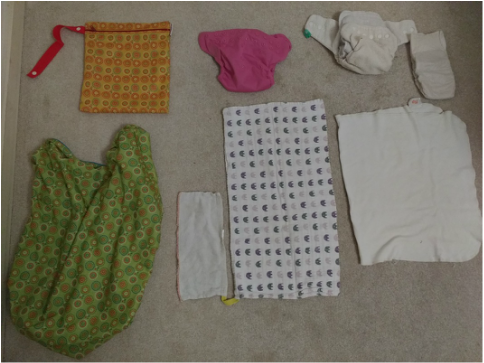 Two wet bags for dirty diapers. ~5 covers (we used flip) ~ 4 overnight fitted diapers with insert ~ 12 prefolds (primarily flip and some cheap burp cloth) lots of small cloths This selection allowed us to wash diapers every 2-3 days. In the Sierras the diapers dried really fast, but they take a bit longer on the coast especially the fitted diapers. It is often worth it too just go with disposables at night. In general, I found that cloth diapers only are worth it if you are going for longer than 3 days. If you are not going to wash, you might as well carry disposables. Washing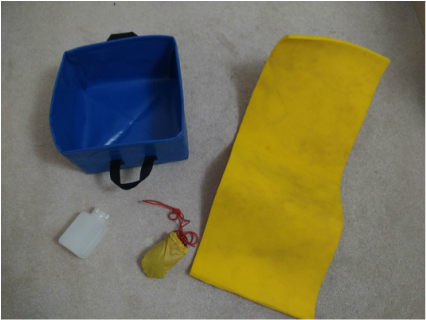 Not much is needed for the washing of diapers. We would bring the following: 1. Foldable wash basin. 2. Soap 3. Cord for drying A foamy is also nice for the changing. Compostable inserts, elimination communication and liner.Another option we considered based on advice, was to use compostable disposable insert in a reusable cover. This is not really an option in the alpine as things decompose really slowly, but if you are going on a trip were there is outhouses available this might be an option. If your baby is still young it is also worth it to consider Elimination Communication (EC). Basically you observe your baby and notice cues or signals they give before peeing or pooing. Once you know their cues you can take their diaper off before they go. We did elimination communication with F from she was a few weeks old. There were periods were we would totally avoid poopy diapers and periods were we would deal with the poo like everyone else. Luckily when we did our 8 day hike in the Sierras and our 5 days on the Juan de Fuca trail we only had a few poopy diapers. If we had not practiced EC I would have brought some liners (regardless of whether I was using disposable or cloth). They make it easier to separate the poo from the diaper to dispose of it. I would then try to burn the liner, just like I do with toilet paper. Bears and diapersWe never really worried about bears in relation to our diapers. We have always just stored the diapers in our tent. Maybe we should have worried about it though. In the opinion of the internet, dirty (and scented clean) diapers does attract bears. The safest solution would be treating your dirty diapers as your trash. Storing it in proper bear proof containers or bear hanging it. Alternatively, you could wash diapers every evening. This sounds like either a lot of work or a lot of extra weight (bear-proof containers are heavy). How have you handled diapering in the backcountry? Do you have any tips or tricks? What are your thoughts on diapering in the bear country? Back in January on a trip to Brookton Pt on Seymour, when there was as a hard raincrust, F noticed that the snow wasn't slippery for Mommy, because Mommy had snowshoes. So she requested some of her own. Turns out you can't buy traction aids for toddlers, so Christian and F made these together.... by "together" I mean that Christian made them while Fenya, "sorted" his box of rivets. They work great and has seen lots of use this spring!
|
Recent tripsMarriott Basin
Alcoholic Traverse Tenquille Lake River of Golden Dreams Desolation Sound Eldred Valley Triple M Triathlon - Misty, McBride, Mamquam Recent tips and thoughtBoxy: Our kid hauling bike
Putting skis on a bike Making a low DIN tech binding What is in our backpacks? The bike canoe trailer Making kids crampons Digging a snowcave Make a kid towing harness Categories
All
|


 RSS Feed