|
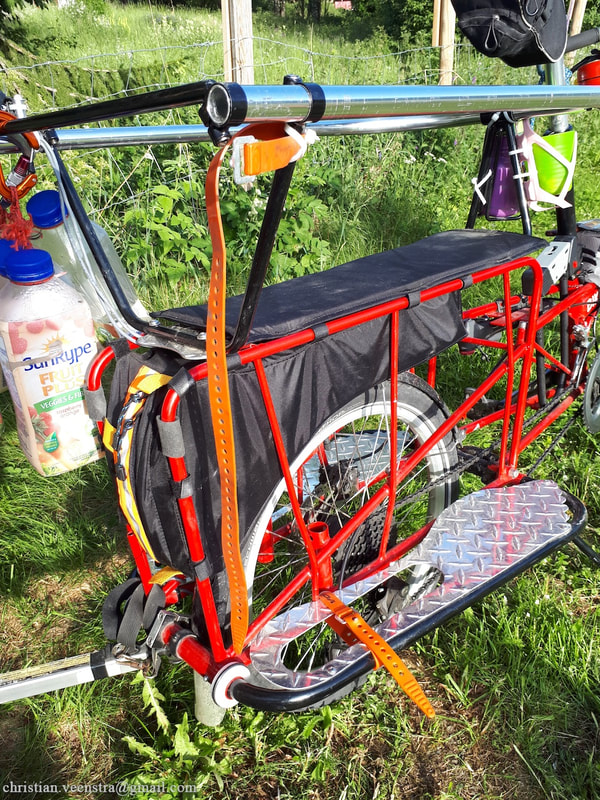
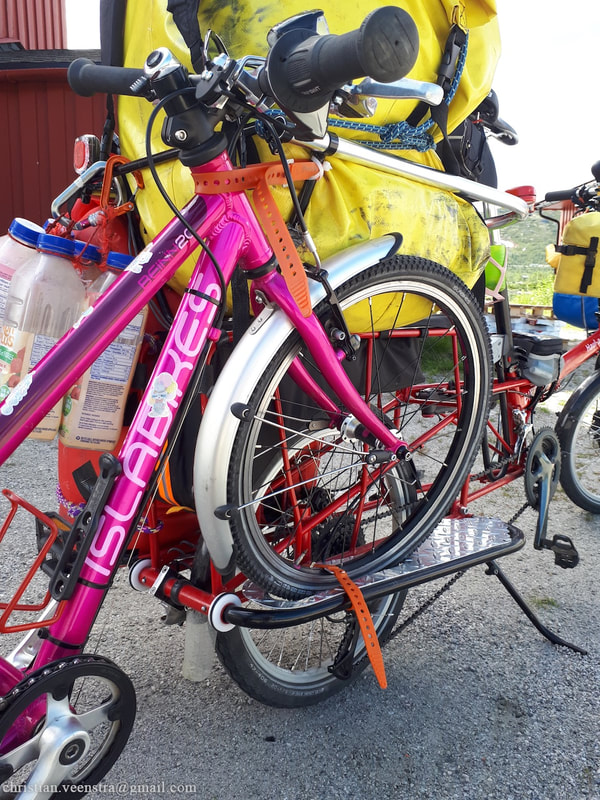
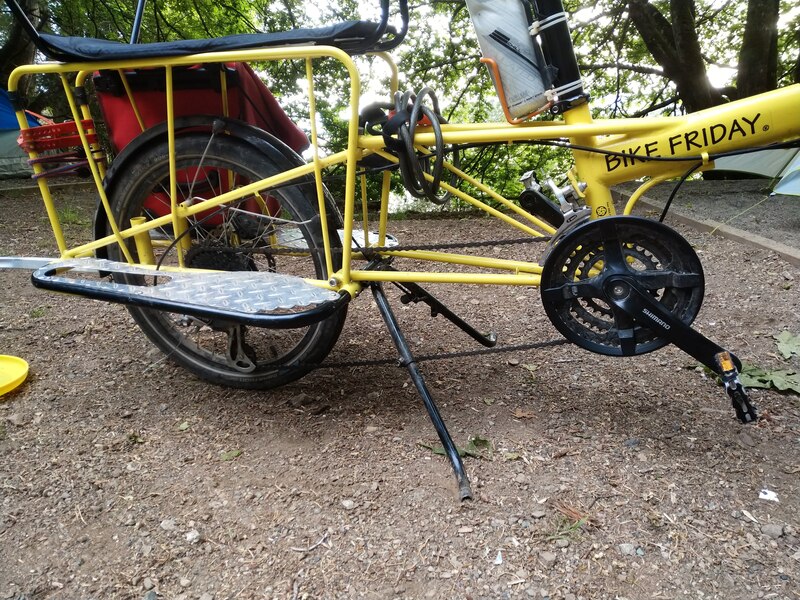
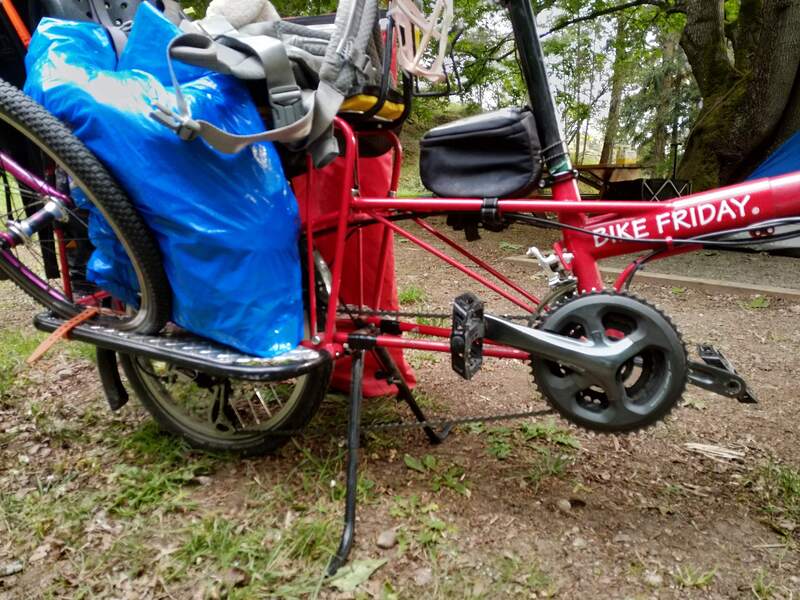
by Christian Here are five tweaks we've made to our Haul-a-Day cargo bike; some are quicker than others, but they've all made our lives easier. Of course we extended the fenders almost all the way to the ground... but we also did some more creative things like shimming our kickstand to bring the balance point into an easier spot, permanently mounted ski-straps in just the right spot for towing, made a chariot attachment adapter, and added some "wheels" in the back corner of the frame that let you easily push it around when oriented vertically. 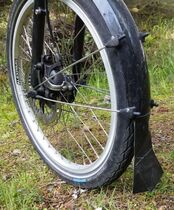 Start with the easy stuff - extending the fenders. The classic fender-extensions involve pieces of old bottles or crazy-carpet... but I've found that duct-tape origami is way easier to install and has better flexibility. I don't think I need to explain anything, hopefully just planting that idea is enough to get you started. That's what I did on the front. On the back I wanted it to be super-floppy, so that it doesn't snag or wear out when moving the bike around vertically; the back is extended with a flap of old inner tube. Permanently mount your tow straps with zip ties. Why fumble around when attaching your kid's bike for towing (or your own bike for towing, on those days when you are dropping the kids and the cargo bike off at school before riding your own bike to work and your wife is going to pick them all up later on her bike and need to tow again). We use one down by the wheel-slot for the wheel, and another from the railing to the steer tube (on a kid's bike - through the wheel and around the fork on an adult bike); we do the upper one up very loosely. They are quasi-permanently mounted with zip ties so they're always at the ready. The zip ties only keep them from falling off when not in use, of course, the strap goes around both bikes when towing. The kickstand shims: Still pretty easy, and oh-so-usefull. Basically we found that the kickstand extends forward pretty far past the "balance point" (straight down). This means that, in order to start the bicycle rolling, you've got to lift one of the wheels pretty high off the ground. This can be difficult if it's really loaded. Additionally the kickstand legs could stand to be a little bit longer to keep the bike extra stable side-to-side. You can solve both problems by adding shims where the kickstand contacts the frame. I'm not sure what Bike Friday's manufacturing tolerances are, but for us the perfect shim thickness was 0.25 inches. I just cut some 0.25 by 0.5 by 1.875" aluminium blocks and held them in place with a few wraps of electrical tape (don't forget to degrease first so they actually stick!). When holding up the bike the shims are pinched in place hard by the kickstand, the tape just keeps them from falling down when riding around. I made the shims a bit longer than strictly required, so that I could tape them where it's not pinching (so the tape doesn't get worn away). This put the kickstand's deployed position way closer to straight down. Then I telescoped the kickstand legs shorter, so that they just barely reach further down than the wheels. Now we can basically just push the bike forwards to get going, and the wheels barely need to leave the ground. Much easier when loaded. This also means the bike could start rolling forwards on its own if pointing downhill, but it's pretty easy to just not park it pointing forwards downhill. Now all I need to do is get around to putting locktight on the kickstand pivot bolts so I don't need to retighten them so often... 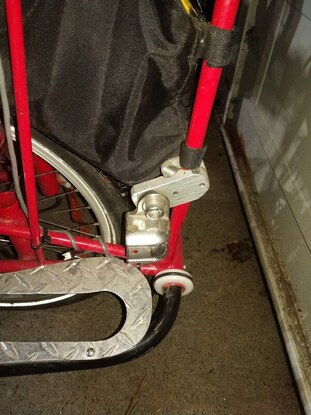 Chariot attachment. I made mine with 2 different clamping holes bored out at +- 30 degrees to allow more flexibility, but I think this was unnecessary so I describe it here such that it can only mount horizontally. Chariot attachment. I made mine with 2 different clamping holes bored out at +- 30 degrees to allow more flexibility, but I think this was unnecessary so I describe it here such that it can only mount horizontally. The chariot attachment: We have the extra large footrests and found that, while we could mount our chariot attachment to the axle, it could collide with the footrests at lean angles encountered during normal cycling. So I made a chariot attachment for our European bike tour. Basically it was a little brick of aluminium with a tapped M10 hole that clamped onto the lowest frame member, at the back. It worked fine (no interference with any frame member at any bicycle orientation), but it was a bit awkward to attach/remove the chariot down there. When some friends left for their bike tour with a brand-new Haul-a-day (the yellow one pictured above) I tried to improve on this when making another version for them, but wasn't really satisfied as it wasn't an improvement in convenience. It did get me thinking, though, and I recently came up with a design that was both easier to make and better to use as it puts the chariot attachment up in the open where it's easy to access and also holds the chariot at a height closer to what you'd get with a normal wheel size. This one clamps around the rearmost vertical frame member. I actually made it so that it clamps on at 45 degrees, because I wasn't sure what elevation we'd want it at and you need to work around the flag-holding tube. In retrospect I could have just made everything straight, so that's what I've described here. 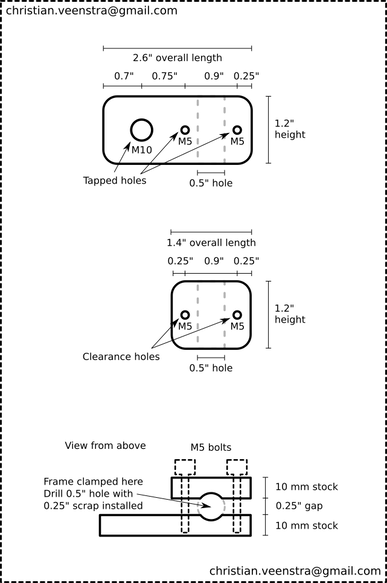 You'll need:
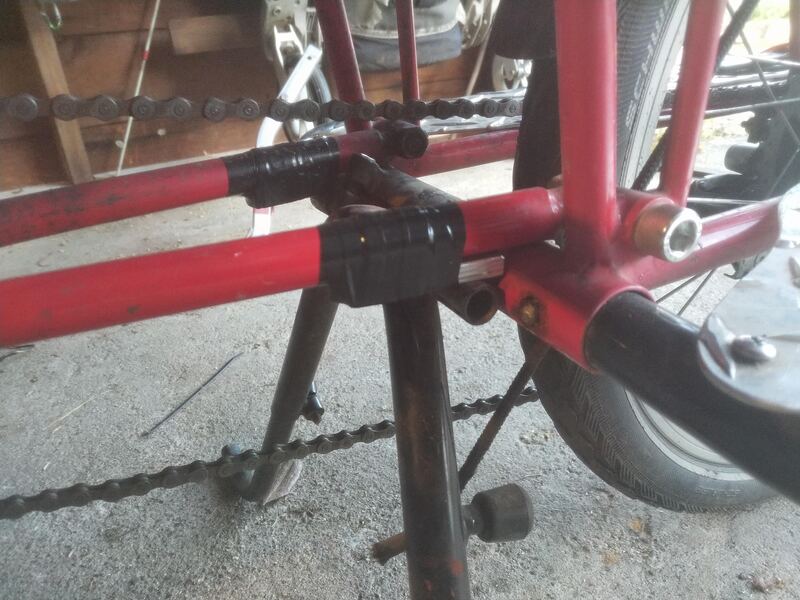
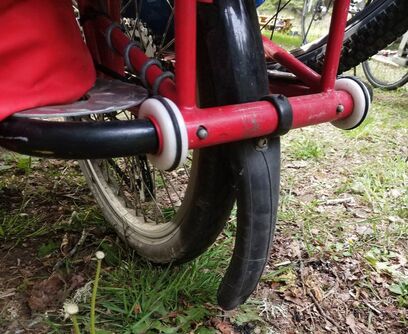 Tail roller-bushings: These little round bushings are press-fit onto the rear/bottom frame member, and have an o-ring slipped over them. When you tip the bike up vertically on it's tail (one of the great features of the Haul-a-Day) they are the things that rub the ground, rather than the frame. I just made them from some round nylon stock I found in the scrap bin at work. The o-ring slides enough against the nylon that it makes it easy to glide the bike around on flat, hard, surfaces (like our garage floor) but not so much that the bike gets away from you or rolls on it's own. I just got an o-ring to match the diameter of the nylon cylinder I found, and winged the dimensions on the lathe. The final dimensions that worked for me were: Thickness: 0.5" Inner diameter: 1" Outer diameter: 1.75"
2 Comments
1/29/2024 07:42:55 am
I wanted to express my gratitude for your insightful and engaging article. Your writing is clear and easy to follow, and I appreciated the way you presented your ideas in a thoughtful and organized manner. Your analysis was both thought-provoking and well-researched, and I enjoyed the real-life examples you used to illustrate your points. Your article has provided me with a fresh perspective on the subject matter and has inspired me to think more deeply about this topic.
Reply
1/29/2024 07:53:35 am
I wanted to express my gratitude for your insightful and engaging article. Your writing is clear and easy to follow, and I appreciated the way you presented your ideas in a thoughtful and organized manner. Your analysis was both thought-provoking and well-researched, and I enjoyed the real-life examples you used to illustrate your points. Your article has provided me with a fresh perspective on the subject matter and has inspired me to think more deeply about this topic.
Reply
Leave a Reply. |
Recent tripsMarriott Basin
Alcoholic Traverse Tenquille Lake River of Golden Dreams Desolation Sound Eldred Valley Triple M Triathlon - Misty, McBride, Mamquam Recent tips and thoughtBoxy: Our kid hauling bike
Putting skis on a bike Making a low DIN tech binding What is in our backpacks? The bike canoe trailer Making kids crampons Digging a snowcave Make a kid towing harness Categories
All
|
 RSS Feed